so-you-think-you-can-code-2025
🗺️ Building Procedural Worlds in Roblox Using Luau & Rojo
AI Transparency: I used an AI assistant to help polish the text and code comments in this post. Everything else— was written by me.
This post is a short demo on how to create procedural terrain and random worlds in Roblox. So, why did I choose to share this?
I recently realized how much fun it is to experiment with Roblox after I was asked to lead a series of lectures and teaching sessions at a “Folk High School” (a unique Scandinavian educational tradition) with a focus on games and digital entertainment. They wanted me to dive into Luau (a language derived from Lua that powers Roblox). What you see here is a subset of the curriculum I developed for those students—demonstrating that with the right tools, you can build complex, infinite worlds with surprisingly simple code.
Starting a procedural generation project in Roblox requires a powerful, organized workflow. The built-in Studio editor is excellent for visual work, but for complex Lua code, a modern IDE like VS Code is superior.
This is where Rojo, the developer toolchain, comes in. Rojo (see rojo.space) is the bridge that lets you write clean, version-controlled code in VS Code and instantly sync it into Roblox Studio.
Part 1: Setting up Rojo and VS Code
We’ll start with a clean environment, installing the essential tools and connecting your project.
Step 1: Install Rokit (The Tool Manager)
Rokit is the recommended toolchain manager for modern Roblox development. It makes installing and managing tools like Rojo simple and consistent across different projects and team members.
You only need to run a single command in your terminal to install it.
| Operating System | Installation Command |
|---|---|
| macOS & Linux | curl -sSf https://raw.githubusercontent.com/rojo-rbx/rokit/main/scripts/install.sh |
| Windows | Invoke-RestMethod https://raw.githubusercontent.com/rojo-rbx/rokit/main/scripts/install.ps1 |
Note: After running the command, you may need to restart your terminal window to ensure the
rokitcommand is correctly recognized.
Step 2: Prerequisites
Ensure you have the following installed and ready:
- Roblox Studio
- Visual Studio Code (VS Code)
Here you can find Roblox Studio - https://create.roblox.com/docs/tutorials/curriculums/studio/install-studio)
Step 3: Install Rojo CLI (The Synchronization Server)
The Rojo command-line tool (CLI) is necessary for creating the project configuration and running the synchronization server. We use Rokit to download it.
-
Add Rojo to your project’s tool list:
rokit add rojo -
Download and Install the tools:
rokit install -
Initialize the Rojo Project:
Open your project folder in VS Code, open the integrated terminal (Ctrl+`), and run:
rojo init
Step 4: Install the VS Code Extension
The extension simplifies the workflow and manages the connection to Studio without needing a separate plugin.
- Open VS Code.
- Go to the Extensions view (
Ctrl+Shift+X). - Search for:
Rojo - Roblox Studio Sync - Install the extension.
Step 5: Start Syncing
-
Start the Server:
In the VS Code terminal, run:
rojo serveThe terminal will show a message like:
Rojo server listening: Address: localhost Port: 34872
Keep this terminal window running!
Part 2: The Project Blueprint and File Mapping
Now that Rojo is running, let’s understand how it transforms your local files into Roblox Instances.
📄 The Project Blueprint: Understanding default.project.json
The file created by rojo init is the blueprint that maps your computer’s filesystem to the services inside your Roblox game.
{
  "name": "ProceduralLandscape",
  "tree": {
    "$className": "DataModel",
    "ReplicatedStorage": {
      "$className": "ReplicatedStorage",
      "Modules": {
        "$path": "src/Modules"
      }
    },
    "ServerScriptService": {
      "$className": "ServerScriptService",
      "Server": {
        "$path": "src/Server"
      }
    }
  }
}
The key synchronization link is the "$path" property. It tells Rojo: “Take everything in this local folder (e.g., src/Modules) and place it inside this Roblox Instance (e.g., ReplicatedStorage.Modules).”
💡 The Power of Text Files: File-to-Instance Mapping
Rojo’s brilliance is its ability to read the file name suffix to determine exactly which Roblox Instance to create.
| File Name Suffix | Roblox Instance Created | Where it Runs |
|---|---|---|
.luau or .lua |
ModuleScript |
Both Client and Server |
.server.luau |
Script |
Only the Server |
.client.luau |
LocalScript |
Only the Client |
Part 3: Connecting and Preparing the Studio Environment
1. Create a New Experience
Open Roblox Studio, click New Experience, and choose the Baseplate template. It should look something like this:
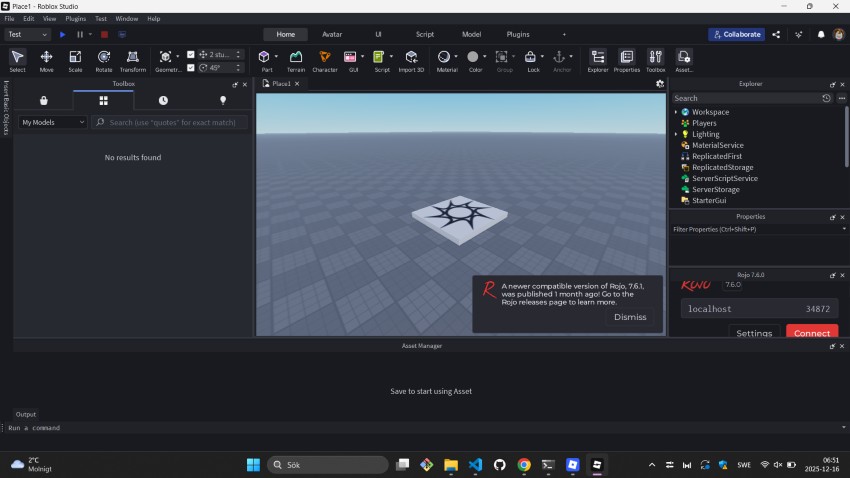
2. Connect the Rojo Server
The Rojo - Roblox Studio Sync VS Code extension will detect the running Studio session. Once connected, you will instantly see your Server and Modules structure appear in the Explorer window of Roblox Studio.
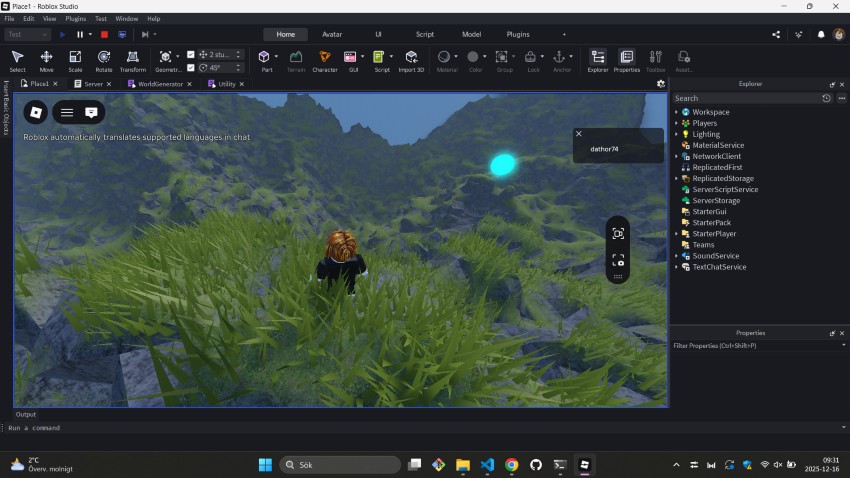
3. Start Coding and Testing!
Edit your scripts in VS Code. Every save (Ctrl+S) reflected instantly in Studio. Press Play in Studio to run your code.
Part 4: The Procedural Engine Walkthrough
In this setup, we use a Subtractive Design: we fill a volume with solid rock and then “carve” the landscape and tunnels out of it.
1. Config.luau
This file acts as the settings dashboard. Changing these constants redefines the entire world.
local Config = {}
	Config.TERRAIN_SIZE = 250      -- Half the map width
	Config.HEIGHT_SCALE = 300      -- Maximum peak height
	Config.TERRAIN_RES = 4          -- Resolution (Lower = higher detail)
	Config.CAVE_COUNT = 15          -- Number of tunnel systems
	Config.BOUNDARY_WALLHEIGHT = 400
	Config.WALL_THICKNESS = 60
return Config
2. Utility.luau
The core of our realism is Fractal Brownian Motion (FBM). Standard Perlin noise looks like smooth hills; we layer 8 “octaves” to add jagged crags and tiny ledges.
-- Utility.luau
...
function Utility.noise2D(x, z)
    local total, freq, amp = 0, 0.0035, 1.0
    for i = 1, 8 do
        total += math.noise(x * freq, z * freq) * amp
        freq *= 2.0  -- Doubles the detail density
        amp *= 0.6   -- Reduces the impact of smaller details
    end
    -- Normalizes the result into a clean height value
    local zeroToOne = (math.clamp(total, -2.0, 1.5) + 2.0) / 3.5
    return zeroToOne * Config.HEIGHT_SCALE
end
Note: While proofreading this, I realized I should have extracted the FBM parameters and moved them into
Config.luau. I didn’t do that here—sorry!
3. WorldGenerator.luau
A. generateTerrain(): The Subtractive Carving
Instead of building up, we start with a “Marble Block” of solid Rock. We calculate the surface height using our Noise utility, then fill everything above that height with Air.
function WorldGenerator.generateTerrain()
    print("🏔️ Building Mountains...")

    local TERRAIN_VOLUME_HEIGHT = CARVING_TOP_Y - TERRAIN_FLOOR_Y
    local terrainCenter = Vector3.new(0, TERRAIN_FLOOR_Y + (TERRAIN_VOLUME_HEIGHT / 2), 0)
    local terrainSize = Vector3.new(TERRAIN_SIZE * 2, TERRAIN_VOLUME_HEIGHT, TERRAIN_SIZE * 2)

    -- 1. Create the solid "Marble Block"
    Terrain:FillBlock(CFrame.new(terrainCenter), terrainSize, Enum.Material.Rock)

    for ix = 1, World.gridSize + 1 do
        local worldX = -TERRAIN_SIZE + (ix - 1) * TERRAIN_RES
        if ix % 50 == 0 then task.wait() end

        for iz = 1, World.gridSize + 1 do
            local worldZ = -TERRAIN_SIZE + (iz - 1) * TERRAIN_RES
            -- 2. Calculate height using Noise
            local y = math.max(Utility.noise2D(worldX, worldZ), TERRAIN_FLOOR_Y)
            World.setTerrainHeight(ix, iz, y)

            -- 3. Carve away the air above the surface
            local airHeight = CARVING_TOP_Y - y
            local airSize = Vector3.new(TERRAIN_RES, airHeight, TERRAIN_RES)
            local airCenterY = y + (airHeight / 2)
            Terrain:FillBlock(CFrame.new(Vector3.new(worldX, airCenterY, worldZ)), airSize, Enum.Material.Air)

            -- 4. Paint the top layer with grass
            local grassSize = Vector3.new(TERRAIN_RES, 2, TERRAIN_RES)
            local grassPos = Vector3.new(worldX, y + 1, worldZ)
            Terrain:FillBlock(CFrame.new(grassPos), grassSize, Enum.Material.Grass)
        end
    end
end
B. generateCaves(): The Worm Algorithm
This uses a Random Walk burrower. It picks a flat spot and “digs” through the rock.
function WorldGenerator.generateCaves()
    print("🌌 Carving Tunnels...")
    for i = 1, Config.CAVE_COUNT do
        local x = Random:NextNumber(-Config.TERRAIN_SIZE, Config.TERRAIN_SIZE)
        local z = Random:NextNumber(-Config.TERRAIN_SIZE, Config.TERRAIN_SIZE)

        if not Utility.isLocationFlat(x, z) then continue end
        local surfaceY = Utility.getGroundY(x, z)

        -- Mark the entrance
        local marker = Utility.createPart(Vector3.new(10,10,10), Color3.fromRGB(0,170,255), Vector3.new(x, surfaceY + 25, z), Enum.Material.Neon, Workspace)
        marker.Shape = Enum.PartType.Ball

        local currentPos = Vector3.new(x, surfaceY - TUNNEL_RADIUS, z)
        local dir = Vector3.new(Random:NextNumber(-1,1), Random:NextNumber(-0.2,0.2), Random:NextNumber(-1,1)).Unit
        Terrain:FillBall(Vector3.new(x, surfaceY, z), EXIT_HOLE_RADIUS, Enum.Material.Air)

        -- The "Worm" loop
        for j = 1, 60 do
            if j % 15 == 0 then task.wait() end
            local rot = CFrame.Angles(0, Random:NextNumber(-0.2, 0.2), 0)
            dir = rot:VectorToWorldSpace(dir).Unit
            currentPos += dir * CARVE_STEP

            -- Prevent digging out of the world bottom
            if currentPos.Y < TERRAIN_FLOOR_Y + 5 then dir += Vector3.new(0, 0.5, 0) end
            Terrain:FillBall(currentPos, TUNNEL_RADIUS, Enum.Material.Air)
        end
    end
end
C. generateBoundaryWalls()
Simple logic to create glass barriers at the edges of the TERRAIN_SIZE.
How the logic flows
The generator first creates a monolith of rock based on the Config settings. Then, it uses the FBM Noise to decide where the “ground” is, carving away air and painting grass. Finally, the Worm algorithm iterates a set number of times, snaking through the rock and using FillBall with the Air material to create natural-looking, organic cavern systems.
📄 The Complete Source Files
Utility.luau
local Workspace = game:GetService("Workspace")
local Utility = {}
local Config = require(script.Parent.Config)

local RAYCAST_PARAMS = RaycastParams.new()
RAYCAST_PARAMS.FilterType = Enum.RaycastFilterType.Include
RAYCAST_PARAMS.FilterDescendantsInstances = {Workspace.Terrain}

function Utility.noise2D(x, z)
    local total, freq, amp = 0, 0.0035, 1.0
    for i = 1, 8 do
        total += math.noise(x * freq, z * freq) * amp
        freq *= 2.0
        amp *= 0.6
    end
    local zeroToOne = (math.clamp(total, -2.0, 1.5) + 2.0) / 3.5
    return zeroToOne * Config.HEIGHT_SCALE
end

function Utility.getGroundY(x, z)
    local result = Workspace:Raycast(Vector3.new(x, 1000, z), Vector3.new(0, -2000, 0), RAYCAST_PARAMS)
    return result and result.Position.Y or 0
end

function Utility.isLocationFlat(x, z)
    local result = Workspace:Raycast(Vector3.new(x, 1000, z), Vector3.new(0, -2000, 0), RAYCAST_PARAMS)
    return result and result.Normal.Y > 0.9 or false
end

function Utility.createPart(size, color, pos, material, parent)
    local p = Instance.new("Part")
    p.Size, p.Color, p.Position, p.Anchored, p.Material, p.Parent = size, color, pos, true, material, parent
    return p
end

return Utility
WorldGenerator.luau
Note: The World module is a small helper script used to store the grid state, which you can find in the full source link below
local Workspace = game:GetService("Workspace")
local Terrain = Workspace.Terrain
local Random = Random.new(tick())
local WorldGenerator = {}

local Config = require(script.Parent.Config)
local World = require(script.Parent.World) -- Helper to store grid data
local Utility = require(script.Parent.Utility)

local TERRAIN_FLOOR_Y = 10
local TUNNEL_RADIUS = 9
local CARVE_STEP = 6.75
local EXIT_HOLE_RADIUS = 14

function WorldGenerator.generateTerrain()
    print("🏔️ Carving Mountains...")
    local topY = Config.HEIGHT_SCALE + 50
    local size = Vector3.new(Config.TERRAIN_SIZE * 2, topY - TERRAIN_FLOOR_Y, Config.TERRAIN_SIZE * 2)

    Terrain:FillBlock(CFrame.new(0, TERRAIN_FLOOR_Y + size.Y/2, 0), size, Enum.Material.Rock)

    for ix = 1, ((Config.TERRAIN_SIZE * 2) / Config.TERRAIN_RES) + 1 do
        local worldX = -Config.TERRAIN_SIZE + (ix - 1) * Config.TERRAIN_RES
        if ix % 50 == 0 then task.wait() end

        for iz = 1, ((Config.TERRAIN_SIZE * 2) / Config.TERRAIN_RES) + 1 do
            local worldZ = -Config.TERRAIN_SIZE + (iz - 1) * Config.TERRAIN_RES
            local surfaceY = math.max(Utility.noise2D(worldX, worldZ), TERRAIN_FLOOR_Y)

            local airHeight = topY - surfaceY
            Terrain:FillBlock(CFrame.new(worldX, surfaceY + airHeight/2, worldZ), Vector3.new(Config.TERRAIN_RES, airHeight, Config.TERRAIN_RES), Enum.Material.Air)
            Terrain:FillBlock(CFrame.new(worldX, surfaceY + 1, worldZ), Vector3.new(Config.TERRAIN_RES, 2, Config.TERRAIN_RES), Enum.Material.Grass)
        end
    end
end

function WorldGenerator.generateCaves()
    print("🌌 Carving Tunnels...")
    for i = 1, Config.CAVE_COUNT do
        local x = Random:NextNumber(-Config.TERRAIN_SIZE, Config.TERRAIN_SIZE)
        local z = Random:NextNumber(-Config.TERRAIN_SIZE, Config.TERRAIN_SIZE)

        if not Utility.isLocationFlat(x, z) then continue end
        local surfaceY = Utility.getGroundY(x, z)

        -- Entrance Marker (Blue)
        local marker = Utility.createPart(Vector3.new(10,10,10), Color3.fromRGB(0,170,255), Vector3.new(x, surfaceY + 25, z), Enum.Material.Neon, Workspace)
        marker.Shape = Enum.PartType.Ball

        local currentPos = Vector3.new(x, surfaceY - TUNNEL_RADIUS, z)
        local dir = Vector3.new(Random:NextNumber(-1,1), Random:NextNumber(-0.2,0.2), Random:NextNumber(-1,1)).Unit
        Terrain:FillBall(Vector3.new(x, surfaceY, z), EXIT_HOLE_RADIUS, Enum.Material.Air)

        for j = 1, 60 do
            if j % 15 == 0 then task.wait() end
            local rot = CFrame.Angles(0, Random:NextNumber(-0.2, 0.2), 0)
            dir = rot:VectorToWorldSpace(dir).Unit
            currentPos += dir * CARVE_STEP

            if currentPos.Y < TERRAIN_FLOOR_Y + 5 then dir += Vector3.new(0, 0.5, 0) end
            Terrain:FillBall(currentPos, TUNNEL_RADIUS, Enum.Material.Air)
        end

        -- Exit Marker (Orange)
        local exitY = Utility.getGroundY(currentPos.X, currentPos.Z)
        local exitMarker = Utility.createPart(Vector3.new(8, 8, 8), Color3.fromRGB(255, 85, 0), Vector3.new(currentPos.X, exitY + 25, currentPos.Z), Enum.Material.Neon, Workspace)
        exitMarker.Shape = Enum.PartType.Ball
    end
end

function WorldGenerator.generateWorld()
    WorldGenerator.generateTerrain()
    WorldGenerator.generateCaves()
end

return WorldGenerator
I have added a project subfolder containing all the source code, so you can download and run it once the necessary dependencies (Rojo, Roblox, etc.) are in place (see above)
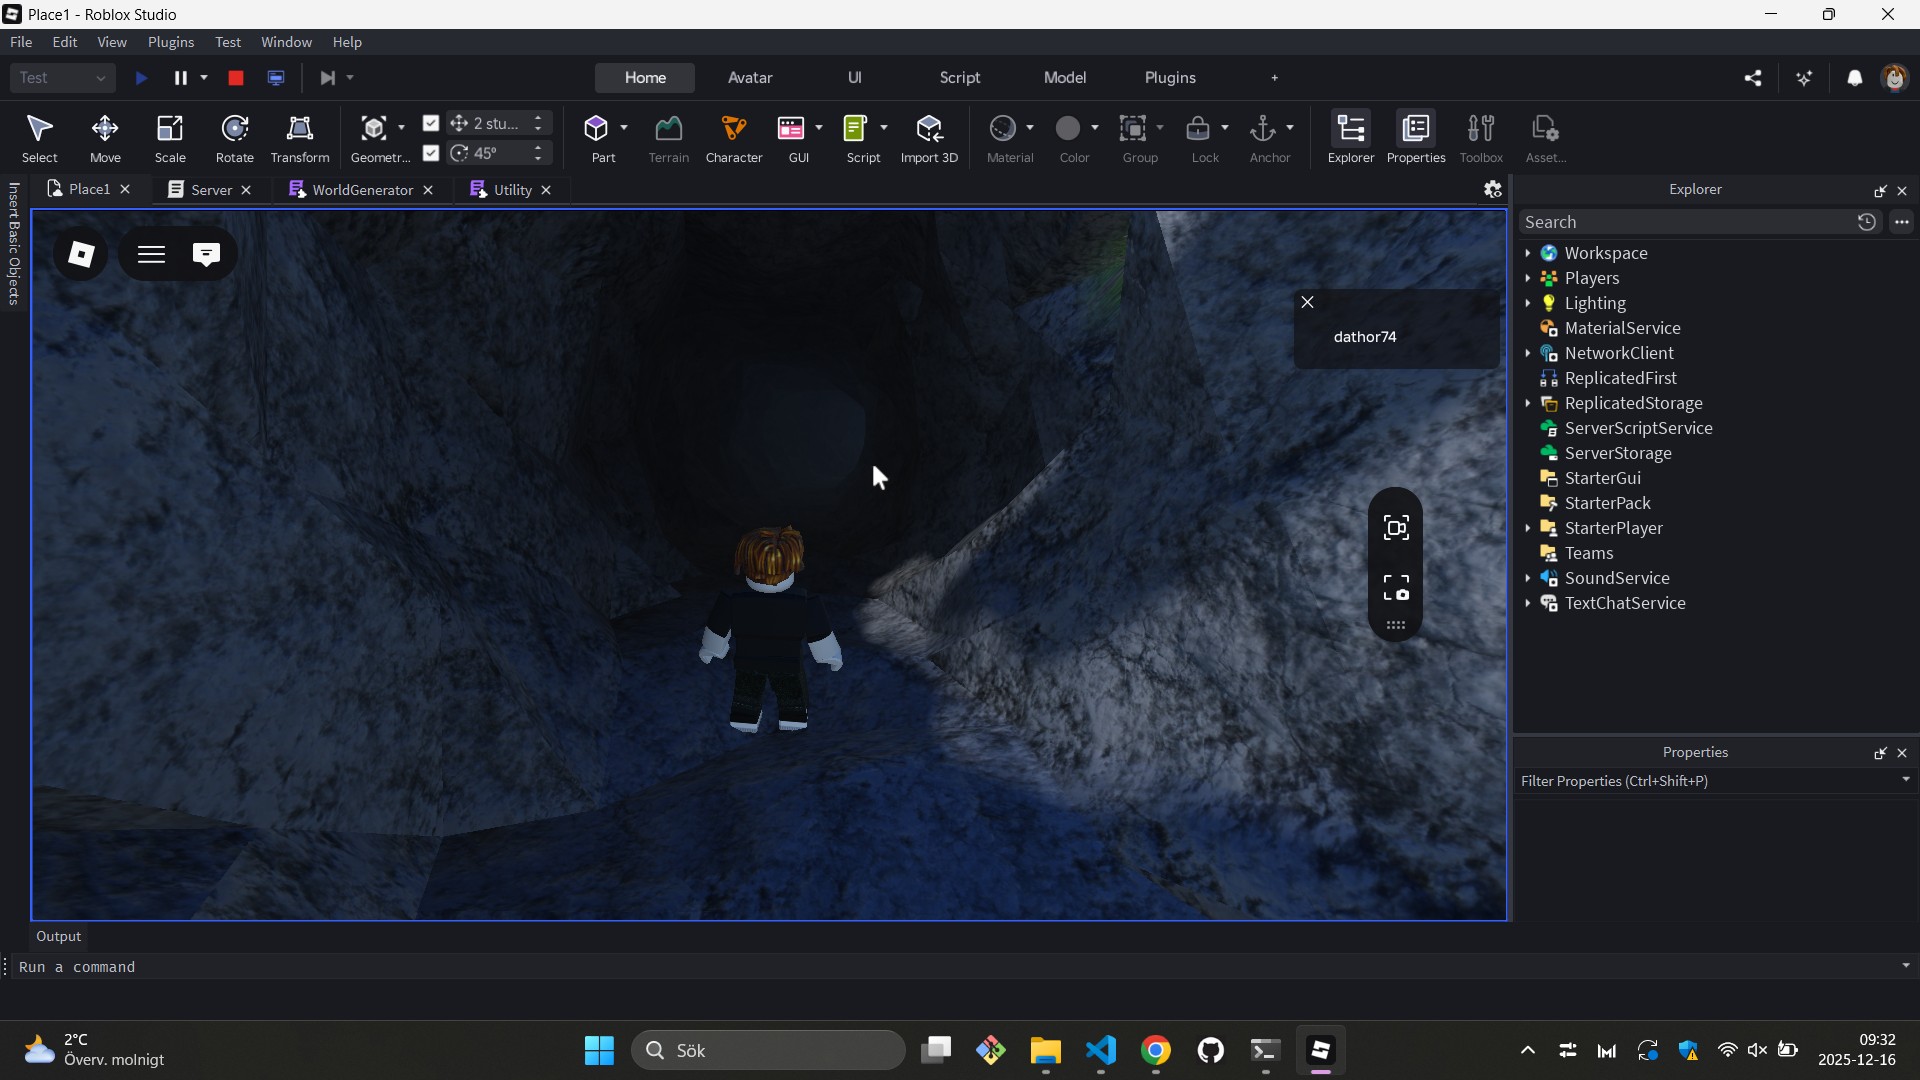
Part 5: Initializing the Server (init.server.luau)
This manages player spawning to prevent them from falling into the void while the mountains are being built.
local Players = game:GetService("Players")
local Modules = script:WaitForChild("Modules")
local WorldGenerator = require(Modules:WaitForChild("WorldGenerator"))
local Utility = require(Modules:WaitForChild("Utility"))

local spawnCheckCords = Vector2.new(0, 0)

print("🌍 World initialization sequence started...")

-- Run the generation
pcall(function()
    WorldGenerator.generateWorld()
end)

local function spawnPlayerOnSurface(player)
    player.CharacterAdded:Connect(function(character)
        character:WaitForChild("HumanoidRootPart")
        local surfaceY = Utility.getGroundY(spawnCheckCords.X, spawnCheckCords.Y)
        character:PivotTo(CFrame.new(spawnCheckCords.X, surfaceY + 10, spawnCheckCords.Y))
        print("👤 Player " .. player.Name .. " spawned at Y: " .. surfaceY)
    end)

    -- Handle players who loaded before the script reached this point
    if player.Character then
        local surfaceY = Utility.getGroundY(spawnCheckCords.X, spawnCheckCords.Y)
        player.Character:PivotTo(CFrame.new(spawnCheckCords.X, surfaceY + 10, spawnCheckCords.Y))
    end
end

Players.PlayerAdded:Connect(spawnPlayerOnSurface)
for _, player in ipairs(Players:GetPlayers()) do
    spawnPlayerOnSurface(player)
end

print("✅ World generation complete!")
Summary
In this article, we combined a professional software-development workflow with procedural generation techniques to build large-scale, natural-looking Roblox landscapes entirely through code. By leveraging Rojo as the bridge between VS Code and Roblox Studio, we moved beyond ad-hoc scripting and into a maintainable, version-controlled setup that scales well for both solo developers and teams.
On the technical side, we explored how Fractal Brownian Motion can transform simple Perlin noise into rich, believable terrain, and how a subtractive terrain approach—starting with solid rock and carving away air—allows for efficient generation of mountains, valleys, and cave systems. The “worm” algorithm demonstrated how a small amount of randomness, applied iteratively, can produce organic tunnel networks that feel hand-crafted rather than procedural.
More importantly, this project illustrates a mindset: treating Roblox development as real software engineering. Configuration files define world parameters, utilities encapsulate reusable logic, and generators are structured as deterministic systems rather than one-off scripts. This separation of concerns makes experimentation easy—change a constant, rerun the generator, and observe an entirely new world emerge.
This is exactly the approach I aim to teach students: Roblox is not just a platform for assembling parts, but a powerful engine for technical creativity, mathematical thinking, and systems design. With the right tools and a clean workflow, even complex ideas like infinite or semi-infinite worlds become approachable, understandable, and—most importantly—fun to build.
Thanks for reading.
Magnus